Introduction: As we know, Java is the default programming language to make an Android application. But these languages are not the best solution for some time. Like if you want to make games. Where we need fast calculation. Today, a lot of gaming engines are working with c/c++. To achieve it in Android Google offers the Android Native Development Kit (NDK).
What is the NDK?
The NDK allows developers to write optimized code in C/C++ that compiles to native code. With the NDK, you can make games with better performance on Android devices. We have the following reason to use NDK to make game.
1. Memory management and performance.
2. You can use Renderscript
3. C/C++ have a large body of existing legacy code.
4. We can develop a multiplatform application, the NDK is unbeatable in this domain. Since the same code written in C + + for Android can be easily ported and run the same way on the iOS, Windows or any other platform without changing the original code.
But in some cases, NDK is not recommended, Because.
1. Harder to debug
2. Reduce flexibility.
How it works?
As we know everything in an Android application is execute in the context of the Dalvik Virtual Machine or ART. In order to integrate your C/C++ code with this environment. We have to use the JNI (Java Native Interface). This is how the Java and C/C++ components talk to each other.
For use it in Android, We have to call System.loadLibrary("Name of file") static method from Java. When you load a .so file, its JNI_OnLoad() function is called if it exists and functions starting with Java_ are mapped to the corresponding Java methods. These methods are to be declared in Java classes and have the "keyword" native to specify that their implementation comes from a .so file.
public native int numbers(int x, int y);
At runtime, when the Java execution reaches a method with its implementation being native. This native implementation is directly executed. When it returns, the Java code execution continues.
The JNI also gives you jni.h header, that gives you the methods to access the Java environment (JavaVM*, JNIEnv*) so you can manipulate, create and access Java primitives (jint, jlong.), objects (jobject, jclass.), exceptions (jthrowable), etc.
NDK setup with Android studio
Android Studio only includes the default tools and SDK. So, you can download and install the NDK package separately.
Example
So, Let create your first JNI application written in C/C++ with Android Studio.
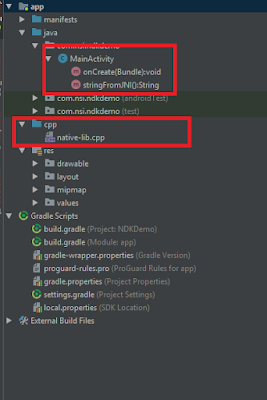
Once you have done all the steps. You will see cpp folder that contains all C/C++ files.
The “ndk-build” script is responsible for automatically synch with the project and determining what to build. The script is also responsible for generating binaries and copying those binaries to your app’s project path.
There are also native shared libraries (.so) that the NDK builds from the native source code and Native static libraries (.a), and these can be linked against other libraries. The Application Binary Interface (ABI) uses the .so files to know exactly how your app’s machine code will work with the system when the app is running. The NDK supports ARMABI by default along with MIPS and x86.
Here, We have java file that load and map with C/C+ methods.
public class MainActivity extends AppCompatActivity {// Used to load the 'native-lib' library on application startup.static {System.loadLibrary("native-lib");}@Overrideprotected void onCreate(Bundle savedInstanceState) {super.onCreate(savedInstanceState);setContentView(R.layout.activity_main);// Example of a call to a native methodTextView tv = (TextView) findViewById(R.id.sample_text);tv.setText(native_say_hello_world());}/*** A native method that is implemented by the 'native-lib' native library,* which is packaged with this application.*/private native String native_say_hello_world();}
On the side c++ side, We have created a cpp file and a method that refers to the native method with that was created during step #2. The method has to be named correctly, including the name of the Java package and class. This method can have parameters and returns Java classes such as jobject, jstring, jint or whatever that starts with the letter j. We can return void as well.
JNIEXPORT jstring JNICALL Java_com_example_app_MainActivity_native_say_hello_world(JNIEnv* env, jobject thiz ) {std::string hello = "Hello from C++";return env->NewStringUTF(hello.c_str());}


