Wednesday, December 26, 2018

Flutter - Firebase cloud storage example

In mobile applications, you may notice image, video and other files that attract users and provide a better utility. These files are stored on the cloud. Cloud file storage is a storage service that is delivered over the internet.
Flutter firebase storage and database
Cloud file storage is most appropriate for unstructured data or semi-structured data, such as documents, spreadsheets, presentations, and other file-based data. There are several cloud storage providers with different features and price plans like AWS, Dropbox, Firebase storage etc.

In this post, we are going to see how you can upload a image on Firebase storage in a Flutter Application. In fact not only images you can use this firebase storage tutorial to upload any kind of file to firebase storage. I’ll explain, how you can create a Flutter application with a file upload feature that allows users to upload a image file from camera and gallery to cloud and display uploaded files in a grid list. For this, I’ll use Firebase cloud storage which can be accessed using Firebase SDK for cloud storage.
Share:

Sunday, December 16, 2018

Flutter - Auto JSON serialization and deserialization like GSON.

To make a big application, we always need some rest API's to provide a dynamic feature to the user. These API often supports JSON as a data format for communication through HTTP protocol.

flutter-json-serialization-deerialization
If you have worked with native Android application development. You definitely missing those POJO classes in Flutter. After hit a request to the server, the server will return a JSON string. If you want to use data flexibly, we need to convert the JSON string into an object.

Share:

Wednesday, November 28, 2018

Flutter - Pull to refresh widget.

Pull to Refresh or Swipe Down is a common feature of all big mobile Application. You might have seen it in a lot of mobile apps like Twitter and Facebook provides a feature to swipe or pull down to refresh its content. When you swipe from top to bottom of the screen. After that, a loader will be shown and will disappear once the new content is loaded.

pull-to-refresh-flutter
In this post, we are going to build a Flutter Application to achieve it. Flutter SDK providing us RefreshIndicator to apply a pull to refresh on any screen. To apply a pull to refresh on any screen, we have to wrap the root widget of the screen inside of RefreshIndicator. 

Share:

Friday, November 23, 2018

Flutter - ListView items custom filter.

We always use listview to display too many items like contact numbers and products in any shopping application. Let's assume a situation, you want to see an item that's placed in the bottom of list. So, it will irritate you to always scroll it down to see a particular item.

list view cutom search filter
In mobility, we can make it easy with the help of a search feature. ListView with search functionality helps the user to easily get the required results. In the search box, we can filter the data according to data entered by the user and this option is really necessary for making it user-friendly. By using this feature user can filter items by name, occupation, address, etc. Search functionality reduces navigation complexity for the user and also saves the user’s valuable time.
Share:

Sunday, November 11, 2018

Flutter - Firebase Realtime Database CRUD Operation

Firebase Realtime Database is a cloud-hosted database that helps us to store and sync data with NoSQL database in realtime to every connected client platforms like Android, iOS, and Web.  

firebase-database-flutter
Nowadays NoSQL databases are gaining popularity and Firebase Realtime Database is one of the NoSQL databases. Firebase store all the data in JSON format and any changes in data reflects immediately by performing a sync operation across all the platforms. This allows us to build a flexible realtime app easily with minimal efforts. 
Share:

Friday, November 9, 2018

How to push source code to BitBucket from Android Studio

If you are working on a big application with Android Studio and you may want to securely store the project code to a remote server. For this purpose, we can use BitBucket repository system. Which will allow you to create a repository and push all source code safely.

Android-studio-bitbucket-source-code-pushIt is an online Application for versioning control, web-based storage of codes. In simplest term, it can contain a repository of project source codes in Mercurial or Git revision control system. It’ll provide you all Git features with Project management system. So you can create Multiple branches, Tags and manage your source code safely even with multiple developers working on the same project.

Share:

Sunday, November 4, 2018

Flutter - Parse local JSON file in Flutter.

To make a big mobile application, we always need API's to get dynamic JSON data from the server. JSON is text-based, human-readable data interchange format that is used for representing simple data structures and objects. By using text-based JSON, we can create a list of objects in mobile and web application.

Flutter local json parse
But sometimes in the mobile applications, we have to put JSON file in the application package rather than get it from the server. In the mobile application, we can put it in anywhere in the application directory as per platform guideline. Such as in Android and Flutter, we can put a JSON file in the assets folder and parse it on runtime to get the data and use it accordingly.
Share:

Saturday, November 3, 2018

Flutter - Infinite scroll or load more list.

Infinite scroll or load more list is the popular replacement of pagination in a mobile application. With the help of pagination, you can display big data in a small piece of data.

Flutter load more list itemPagination is a common feature in heavy content apps. It breaks down a list of content into equal smaller pieces and loaded one at a time. Such as, in Facebook, Twitter and Instagram, we spend countless hours scrolling. They just don’t seem to end.

In mobility, if you going to make a app that have a ton of content that takes too long to load. From a developer perspective, how would you load all of that content?. It is not possible to make a call for such huge content at one go. We’ll have to request them in parts or pages.
Share:

Saturday, October 27, 2018

Flutter - Publish plugins and packages

publish-flutter-plugin
As a mobile developer, we always need some already developed own or third-party libraries. The library makes our project development fast,  save development time and some time provide us a great performance. The project development may become hard If we do not use all those third-party libraries in our projects.

Share:

Friday, October 19, 2018

Flutter – Login and registration authentication with Firebase

Authentication is a process of identifying a user that is usually based on a username and password. A user can access the certain resource in the application after successfully authenticate.

firebase-auth-login-register
Firebase provides a user authentication feature that is out-of-the-box. Firebase is a cloud service provider that can replace whole server-side part of your application. We do not need any server-side code or configuration. Firebase automatically stores your users’ credentials securely. This separates sensitive user credentials from your application data and lets you focus on the user interface and experience for your app. Firebase comes with a bundle of auth features support. As you can see below:

Share:

Saturday, October 6, 2018

Flutter - Firebase integration and configuration in a Flutter Application.

To build apps for mobile platforms, we always need a backend server to store data that support your apps. You also want to get your users log-in, which means your backend would have to scale. Then, after you solve your scaling problem, you would need to find creative ways to get more users and measure these activities on your admin dashboard. So, Firebase is a way that we can use as a backend for mobile application. 

Flutter Firebase configure
Flutter is Google's SDK for building mobile apps for iOS and Android. Firebase gives you access to backend services for mobile applications and provides various feature including authentication, storage, database, and hosting, without maintaining your own servers.

In this post, we going to integrate Firebase in Flutter project. We'll see, how can we create a project on Firebase console and integrate it into flutter project. Let's start it with the following steps.


Share:

Sunday, September 30, 2018

Flutter - Back press in a Flutter Application.

back press event
As we know, mobile having a small screen to display content. That why most apps contain several screens to display different types of information. 

Example: We might have a screen that shows products. Our users could then tap on a product to get more information about it on a new screen. In that case, a user will move on another screen of the app.  When a user navigates to application screens. Sometimes we need to handle device back press event like:

1. We want to show a pop-up before the close app or close some connection that app using.
2. You can ask the user to confirm that they want to discard their changes when they tap the back button or back navigation arrow.  

Share:

Flutter - How can send and receive data between screens.

In Flutter, the user interface is displayed through widgets. The widget is used to represent the data to the user and allows user interaction.
In a mobile application, we can have multiple widgets(Screen) and that can interact with each other. During widget interaction, we might be required to pass data from one widget to other.

Example: If you are developing an application for news feed reader, you may require having at least two screens. While the first screen displaying the list of news feeds and other displaying the feed details. Sometimes we need to send data to another screen and after some calculation, we need it back.

How can send data to another screen?
To send data, we have to use Navigator to push a new MaterialPageRoute onto the stack with our data.
Send data
String userName = "www.developerlibs.com"; Navigator.push( context, new MaterialPageRoute( builder: (BuildContext context) => new Screen5(userName)));

How can get back data?  
We can send data back to the previous screen with the help of the pop method.

Get back data.
Navigator.pop(context, "www.developerlibs.com"
 

In this post, we going to create a Flutter application. Where we'll send some data to another screen and we'll receive updated data. To create this app, we have to use navigator and route that we have explained in our post: Screen push and pop with Navigator.


Share:

Saturday, September 29, 2018

P2P Kit is a better way to use Bluetooth in mobility.

Bluetooth is a way to exchange data with other devices wirelessly. Android and Ios provide Bluetooth API to perform several tasks such as:

1. Scan Bluetooth devices.
2. Connect and transfer data between devices.
3. Manage multiple connections etc.

In this post, I'm going to explain the power of P2pkit that is a better way to use Bluetooth in Android and Ios device. It is a Software Development Kit (SDK) which enables application developers to integrate proximity-based features into their apps.
The p2pkit discover nearby devices and estimate their range and seamlessly broadcast content to them.

P2pkit is cross-platform SDK. It's compatible with iOS, macOS, Android and supports several radio technologies (BLE, WiFi Direct). It is very lightweight and hardly consumes any battery.

Nearby devices are notified when a proximity event takes place and receive the identifier, discovery info and range estimation. Your app can respond to this event in any way it chooses. 

Share:

Flutter- Screen push and pop with Navigator.

Flutter SDK provides us lot of widgets to create a beautiful screen. Building a user interface with Flutter is pretty simple. To create a big application, we need to create a multi-screen application. We will be required to move around the application or send data back to the screens. 

navigator, push, pop We need to create a multi-screen application that shows all feature of the application in a specific manner. So, users can constantly be navigating between different screens. For example, from a list to a detail screen of product, from a shopping cart to a checkout screen, from a menu into a form, and many other cases.

Flutter provides us navigation and route to manage multi-screen apps. Navigator creates a stack of route object. A Route tells to navigation where to go from now. The stack of navigator keeps track of where all we went from the beginning and how can we come back to the initial state. Flutter uses both Stack and Route to show a new screen of the application. The route tells which page to load and stack makes sure that it’s loaded on top of existing one. To show and hide a screen, navigator provides us Navigator.push and Navigator.pop methods. By using this, a mobile app can reveal their full-content on another screen.


Share:

Saturday, September 15, 2018

Flutter - Calendar and Date Format in Flutter.

As we know, Flutter has its own UI components, along with an engine to render them on both the Android and iOS platforms.

Calendar in Flutter
To Display date, time and calendar. Flutter providing us some useful widgets like showDatePicker, DateTime, and DateFormat.

In this post, we are going to learn about the above widget. We'll create a flutter Application and we'll see, how we can use above widget in the Flutter Application for display date and time in a specific format. We'll discuss some use case like UTC date conversion.

Share:

Sunday, September 2, 2018

Flutter - Form Validation in Flutter.

Flutter is a mobile UI open source framework to build high-quality native interfaces for iOS and Android apps with the unified codebase. Flutter has its own UI components, along with an engine to render them on both the Android and iOS platforms. You can compose your whole application UI with widgets that contain other widgets.

In this post, we going to discuss form widget. We can use the form to design sign-up and login screen of Application. The best thing about the form is that we can validate each field in the same field. If we creating sign-up and login form of mobile application. Then form validation is an essential part of the app. It saves server computing time because we can validate param at the client side. We can ask the user to a enter valid phone number and we can smartly validate the entered mobile number and other data itself.

Share:

Sunday, August 26, 2018

Flutter - How can draw route on google map between markers.

Route on google map is the easiest way to reach somewhere. Just enter the address of your source and destination point. After that, you will see the right way to go there and you can control the route map.  Google maps highlight the suggested route in a bright blue color and include other possible routes in gray. It is always safe to use a driving map when you are not aware of the place.

Share:

Sunday, August 19, 2018

Flutter - Collapsing Toolbar OR Sliver App Bar

If you are an Android application developer. Then you definitely know about Collapsing Toolbar. It is a wrapper for Toolbar which implements a collapsing app bar. Flutter team calling it Sliver App barIt displays an image or background in the upper part of the screen, occupying a fixed space, so that later, by scrolling upwards, the content changes and becomes a navigation bar in iOS or toolbar in the case of Android. 

In Flutter, Sliver App bar is designed to be used as a direct child of an App Bar. This type of widget is commonly seen in the User Profile Screen. You can check it with Whatsapp user profile screen.

Let's have look on Sliver App Bar properties in the following diagram that flutter providing us.


  • leading: A widget to display before the title. This is the widget where usually a hamburger icon or back button is displayed.
  • title: Toolbar title goes here wrapped in a Text widget.
  • actions: It is the right side of App Bar. Here, you can declare other option of apps like search, setting and profile etc.
  • bottom: The bottom is usually used for a TabBar below the Appbar.
  • flexibleSpace: This widget is used to create a Collapsing Toolbar effect with Appbar.

Share:

Wednesday, August 15, 2018

Kotlin - Higher order functions

In Kotlin, functions can be represented as values by using lambdas or function references.  Regular functions receive only data parameters, whereas a function that receives another function as a parameter and returns a function as a result is called a Higher-order function.

Therefore, a higher-order function is any function to which you can pass a lambda or a function reference as an argument, or a function which returns one, or both.

Share:

Thursday, August 9, 2018

Flutter - Capture Image from camera or gallery and apply crop.

In modern application, if you implementing user profile feature. So, you should implement user profile pic and allow a user to set and change profile pic. A user can set a profile pic from his/her mobile gallery or capture image from camera. 
Image picker in flutter
Besides just picking images from gallery and camera. You can crop it with desired aspect ratio. It is very important if you noticed every app like Facebook, Google etc asks you to crop the image into a square because it fits the best for different use cases.

In this post, we’ll develop an application that picks an image from camera or gallery. After that, we crop it for fit in a circular image widget.

Share:

Wednesday, August 1, 2018

Flutter - GridView builder example.


In a mobile application, GridView is a view group that displays items in a two-dimensional scrolling grid (rows and columns).  Users can select any grid item by clicking on it. By default GridView scrollable, so we don’t need to use ScrollView or anything else with GridView.

The GridView objects may be a Text and Image or a view group which has both an image and some text. An example of GridView is your default image gallery in mobile. Where you have a number of items displayed using them in a grid manner.

Grid view helps users when they’re examining details. For example, if a user is shopping for a shirt, they’ll have a specific type in mind. It’s only after the user has narrowed down the content to a category that grid view is most effective. But once the user is in the category of shirts they want, the images will have more relevancy. The user can scan the shirts and spot certain details they’re looking for with ease.

To implement grid view in the Flutter application, we have GridView widget. The simplest way to get started using grids is by using the  GridView.count constructor, because it allows us to specify how many rows or columns we’d like.

In this post, we'll hit an API and get the detail of countries and display it in the grid view as you can see the final output below. 


This will help us visualize how GridView works. So, let's start its implementation with the following steps.

Creating a new Project

1. Create a new project from File ⇒ New Flutter Project with your development IDE. 
2. Open main.dart file and edit it. As we have set our theme and change debug banner property of Application.
main.dart
void main() => runApp(new MyApp()); class MyApp extends StatelessWidget { @override Widget build(BuildContext context) { final appTitle = 'World'; return new MaterialApp( debugShowCheckedModeBanner: false, title: appTitle, theme: new ThemeData( primaryColor: const Color(0xFF02BB9F), primaryColorDark: const Color(0xFF167F67), accentColor: const Color(0xFFFFAD32), ), home: new HomePage(title: appTitle), ); } }

3. Now create HomePage class inside of main.dart as you can below. Here we using Scaffold as a root widget that contains App bar and FutureBuilder. FutureBuilder displays a progress bar until we getting detail of counties from the server.
main.dart
class HomePage extends StatelessWidget { final String title; HomePage({Key key, this.title}) : super(key: key); @override Widget build(BuildContext context) { return new Scaffold( appBar: new AppBar( title: new Text(title, style: new TextStyle( color: const Color(0xFFFFFFFF), ), ), ), body: new FutureBuilder<List<Country>>( future: fetchCountry(new http.Client()), builder: (context, snapshot) { if (snapshot.hasError) print(snapshot.error); return snapshot.hasData ? new CountyGridView(country: snapshot.data) : new Center(child: new CircularProgressIndicator()); }, ), ); } }

4. After that create network layer of the application that get list of countries from the server and parse it. As you can see above, we have called  fetchCountry method for it
networklayer.dart
import 'dart:async'; import 'dart:convert'; import 'package:flutter/foundation.dart'; import 'package:flutter_gridview/country.dart'; import 'package:http/http.dart' as http; Future<List<Country>> fetchCountry(http.Client client) async { final response = await client.get('http://restcountries.eu/rest/v2/all'); // Use the compute function to run parsePhotos in a separate isolate return compute(parseData, response.body); } // A function that will convert a response body into a List<Country> List<Country> parseData(String responseBody) { final parsed = json.decode(responseBody).cast<Map<String, dynamic>>(); List<Country> list = parsed.map<Country>((json) => new Country.fromJson(json)).toList(); return list; }

5. For contain details of countries, we have to create a model class Country. We'll use it for parse server response JSON and display grid view items.
country.dart
class Country { String name; String nativeName; String flag; String capital; Country({this.name, this.flag, this.capital,this.nativeName}); factory Country.fromJson(Map<String, dynamic> json) { return new Country( name: json['name'] as String, nativeName: json['nativeName'] as String, flag: json['flag'] as String, capital: json['capital'] as String, ); } }

6. At the end, create gridview.dart class and add GridView in the build method. As you can see below, we have declared the size of gridview items by using List. generate method of GridView.
girdview.dart
@override Widget build(BuildContext context) { return new GridView.count( primary: true, crossAxisCount: 2, childAspectRatio: 0.80, children: List.generate(country.length, (index) { return getStructuredGridCell(country[index]); }), ); }
for the class simplicity, we have created a new method getStructuredGridCell. Here, we passing items by using an index in the method, we using Card widget for display detail.
gridview.dart
Card getStructuredGridCell(Country country) { return new Card( elevation: 1.5, child: new Column( crossAxisAlignment: CrossAxisAlignment.stretch, mainAxisSize: MainAxisSize.min, verticalDirection: VerticalDirection.down, children: <Widget>[ new SvgPicture.network( country.flag.replaceAll('https', 'http'), height: 130.0, width: 100.0, placeholderBuilder: (BuildContext context) => new Container( padding: const EdgeInsets.all(60.0), child: const CircularProgressIndicator()), ), new Padding( padding: EdgeInsets.only(left: 10.0), child: new Column( crossAxisAlignment: CrossAxisAlignment.start, children: <Widget>[ new Text(country.name), new Text(country.nativeName), new Text(country.capital), ], ), ) ], )); }


If you have followed the article carefully, you can see the app running very smoothly as shown in the video demo. But if you facing any problem.


Source Code               Flutter firebse storage apk


You can get the working project on Github and please feel free to ask in the comment section below.


Share:

Monday, July 30, 2018

Kotlin - Lambda expressions

Lambda expression in kotlin is an anonymous(a function without name)function. Lambda 
Kotlin Lambda expressions
Expressions help us to write a function in a short way. We can pass functions as arguments to methods and return them. Lambdas are one of the most powerful features in Kotlin. It allows modeling functions in a much simpler way.

Share:

Sunday, July 29, 2018

Flutter - How to fix white screen on app startup in Flutter.

If you are a mobile application developer. You definitely have seen a blank white screen before application first screen launch. 


Flutter default splash screen
Mobile applications do take some amount of time to start up, especially on a cold start. There is a delay there that you may not be able to avoid. This is an unconfigured section of the app that first time they launch. Instead of leaving a blank screen during this time. We should use it to display a splash screen until the app takes to configure itself. 

Share:

Friday, July 27, 2018

Flutter - Custom fonts family

If you are a mobile application developer. You definitely know, we should implement uniform themes in our application. Uniform themes are a great way to create a consistent look for your application. They can makes applications look very similar to each other.
Custom font is a way to achieve it. Fonts can be very important in mobile applications. They make a text more readable and show more attention to various pieces of text. Fonts can make a format look bad or look great depending on how they are integrated into the application. Flutter comes with a few default fonts, however, we are also able to import custom font assets as we would like. After importing the fonts, we can directly call them in the dart code by passing a string to a property.

In this post, we'll look at importing custom fonts and using them inside of our applicationAt the end of this blog, we will be able to add Text with some fonts using flutter widgets which will look like this.


Create a new Flutter Project.

1. Create a new project from File ⇒ New Flutter Project with your development IDE 
2. Create an asset folder on the project root and put all custom fonts that you want to use in the project. As you can see below.


3. After that, declare all the custom fonts in the pubspec.yaml.


As you can see, the font declarations inside of the pubspec.yaml file for our application. In Flutter, we are able to directly specify which font file should correspond with which font family, font weight and font style. This allows us to call these values inside of our application later in a way that feels comfortable.

4. Now, open main.dart file and edit it. As we have set our theme and change debug banner property of Application.
main.dart
void main() { MapView.setApiKey(MapUtil.api_key); runApp(new MaterialApp( debugShowCheckedModeBanner: false, theme: new ThemeData( primaryColor: const Color(0xFF02BB9F), primaryColorDark: const Color(0xFF167F67), accentColor: const Color(0xFFFFAD32), ), home: new HomePage(), )); }

5. After that create a getCustomFont method inside HomePage state full widget class. It'll give a font according to the given param
main.dart
TextStyle getCustomFont(int color, double fontSize,String fontName) { return new TextStyle( // set color of text color: Color(color), // set the font family as defined in pubspec.yaml fontFamily: fontName, // set the font weight fontWeight: FontWeight.w400, // set the font size fontSize: fontSize); }

6. Now edit build method of HomePage widget. As we have used a column inside of the container and call getCustomFont from the text with different font name, size, and color. Font name should be same as we have declared in the pubspec.yaml.
main.dart
@override Widget build(BuildContext context) { return new Scaffold( appBar: new AppBar( title: new Text("Custom Fonts", style: getCustomFont(0xFFFFFFFF, 30.0,"Brandon_bld"), ), ), body:new SingleChildScrollView( child: new Container( padding: EdgeInsets.all(30.0), child: new Column( crossAxisAlignment: CrossAxisAlignment.start, children: <Widget>[ new Text( "Fonts Pacifico", style: getCustomFont(0xFFFF75AA, 40.0,"Pacifico"), ), new Text( "Fonts Brandon bold", style: getCustomFont(0xFF02BB9F, 30.0,"Brandon_bld"), ), new Text( "Fonts Brandon bold dark", style: getCustomFont(0xFF167F67, 30.0,"Brandon_blk"), ), new Text( "Fonts Brandon light", style: getCustomFont(0xFFFFAD32, 30.0,"Brandon_light"), ), new Text( "Fonts Brandon medium", style: getCustomFont(0xFF808000, 30.0,"Brandon_med"), ), new Text( "Fonts Brandon regular", style: getCustomFont(0xFF00FF00, 40.0,"Brandon_re"), ), new Text( "Fonts Brandon thin", style: getCustomFont(0xFFFA8072, 35.0,"Brandon_thin"), ), new Text( "Fonts Pacifico Regular", style: getCustomFont(0xFF8000805, 30.0,"Pacifico_Regular"), ), new Text( "Fonts Roboto bold", style: getCustomFont(0xFF757575, 35.0,"Roboto_bold"), ), ], ), ), ) ); }

Now merge all the code snippet. You will find the final code snippet look like below.

main.dart
import 'package:flutter/material.dart'; void main() => runApp(new MyApp()); class MyApp extends StatelessWidget { @override Widget build(BuildContext context) { return new MaterialApp( title: 'Infinite List', debugShowCheckedModeBanner: false, theme: new ThemeData( primaryColor: const Color(0xFF02BB9F), primaryColorDark: const Color(0xFF167F67), accentColor: const Color(0xFFFFAD32), ), home: new HomePage(), ); } } class HomePage extends StatefulWidget { @override _HomePageState createState() => new _HomePageState(); } class _HomePageState extends State<HomePage> { TextStyle getCustomFont(int color, double fontSize,String fontName) { return new TextStyle( // set color of text color: Color(color), // set the font family as defined in pubspec.yaml fontFamily: fontName, // set the font weight fontWeight: FontWeight.w400, // set the font size fontSize: fontSize); } @override Widget build(BuildContext context) { return new Scaffold( appBar: new AppBar( title: new Text("Custom Fonts", style: getCustomFont(0xFFFFFFFF, 30.0,"Brandon_bld"), ), ), body:new SingleChildScrollView( child: new Container( padding: EdgeInsets.all(30.0), child: new Column( crossAxisAlignment: CrossAxisAlignment.start, children: <Widget>[ new Text( "Fonts Pacifico", style: getCustomFont(0xFFFF75AA, 40.0,"Pacifico"), ), new Text( "Fonts Brandon bold", style: getCustomFont(0xFF02BB9F, 30.0,"Brandon_bld"), ), new Text( "Fonts Brandon bold dark", style: getCustomFont(0xFF167F67, 30.0,"Brandon_blk"), ), new Text( "Fonts Brandon light", style: getCustomFont(0xFFFFAD32, 30.0,"Brandon_light"), ), new Text( "Fonts Brandon medium", style: getCustomFont(0xFF808000, 30.0,"Brandon_med"), ), new Text( "Fonts Brandon regular", style: getCustomFont(0xFF00FF00, 40.0,"Brandon_re"), ), new Text( "Fonts Brandon thin", style: getCustomFont(0xFFFA8072, 35.0,"Brandon_thin"), ), new Text( "Fonts Pacifico Regular", style: getCustomFont(0xFF8000805, 30.0,"Pacifico_Regular"), ), new Text( "Fonts Roboto bold", style: getCustomFont(0xFF757575, 35.0,"Roboto_bold"), ), ], ), ), ) ); } }

Now, run the project and you will see the above output.

If you have followed the article carefully, you can see the app running very smoothly as shown above. But if you facing any problem, please feel free to ask in the comment section below. 


Share:

Wednesday, July 25, 2018

Flutter - Bottom navigation bar.

To navigate from one screen to another screen on a single page, there are many options for making navigation easy in your application for the user. Bottom Navigation Bar is one of them. 


Flutter bottom navigation bar.
Bottom Navigation Bar always stays at the bottom of your mobile application and provides navigation between the views of the mobile application. Each Bottom Navigation bar item denotes a different sub screen or feature of an application.

You should use Bottom Navigation if you have three to five top-level navigation items of the mobile application. Otherwise, we should use Navigation Drawer and scrollable Tabbar. You can see a simple example of Drawer and Tabbar here.

To create a bottom bar based app, Flutter SDK provides us an inbuilt widget BottomNavigationBarYou have to use BottomNavigationBarItem to define item properties. 

In this post, we going to explain a basic of bottom bar implementation in Flutter. We'll use three item, Home, Location, and Friends. After clicking or swipe on the screen, you'll able to change application feature. 

This blog assumes that you have already set up the flutter in your PC and you have a basic idea of Flutter Application. If you have not install flutter yet, get started from here.

So, let's start it,


Share:

Sunday, July 15, 2018

Flutter - Sqlite Database Example.

In the Mobile devices, there are several ways to store persistent data. Flutter and Dart don't provide a built-in abstraction for accessing SQLite databases.
.
Flow of stored data in the database.
But Flutter supports an open source module SQFlite. SQFlite is a way of storing app data in Flutter Application. SQFlite is a Database plugin for flutter. It is highly reliable and embedded Database engine. All the CRUD operation in the database will run on a background thread. SQFlite support transactions batches and automatic version management during open.

Share:

Monday, July 9, 2018

Flutter - Google map plugin.

Flutter team has been building Google map plugin for display google map in Ios and Android. In this post, we going to view the progress of Google map plugin.  Before starting a google map Flutter project. Let's know about the power of Google map.
.
static google map
Google Maps is a web-based service that gives us information about geographical regions around the world. Google Maps offers aerial and satellite views of many places. In some cities, Google Maps offers street views photographs that are taken from its official vehicles.

Google Maps offers several services as part of the larger application, as follows.

1. A route planner offers directions for drivers, bikers, walkers, and users of public transportation who want to take a trip from one location to another.
2. The Google maps application program API's makes it possible for web site administrators to embed Google Maps into a proprietary site such as a real estate guide or community service page.
3. Google maps for mobile offers a location service for motorists that utilizes the Global Positioning System (GPS) location of the mobile device.
4. Google Street View enables users to view and navigate through horizontal and vertical panoramic street-level images of various cities around the world.


As we know,  Google Maps SDK have a large API. In this post, we'll cover the following API. 

  • Markers
  • The ability to show maps inline
  • Camera Updates
  • Map callbacks


MapView for native Ios and Android application is still in progress. So, we can't add it inside of Flutter hierarchy widgets. But don't worry, we have an alternative solution to use the Google Maps. We can use static map API for show maps inline while using the Google Maps SDK for iOS and Android to allow the user to interact with the full-screen map.

Before start Flutter google map application development we have to get google map API key. So, let's get it first.

Share:

Saturday, June 30, 2018

Flutter - Tab bar controller and left drawer.

When you need to wrap multiple screen in a single screen and navigate through them, you have to use Tab and Drawer. When user select a tab, this object sends a message to the parent container for switch the displayed page. 

           Left drawer of mobile

Tab and Drawer provides all feature of an application on a single page. So, user can know about the app easily.

In this post, we'll see TabBar and Drawer implementation in Flutter Application. For achieve and maintain state of Application we'll use Redux architecture that we have discuss here

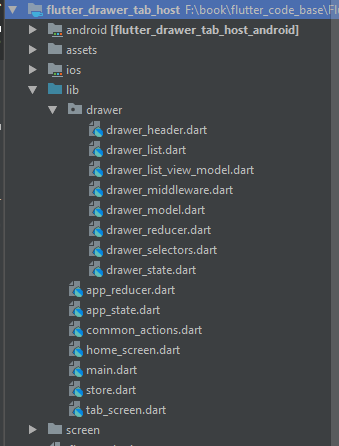
Here, we have complete project structure. 


Let's begin it's implementation with following steps.

1. Update pubspec.ymal dependencies.
pubspec.ymal
flutter_redux: ^0.5.0 intl: ^0.15.2 shared_preferences: ^0.4.0

2. Now, move on application entry point that is main.dart. Here, we have created store. It'll manage application state like selection of left drawer state. As we have explained all about Store in detail hereIf you have query regarding Redux. You should learn about it. Because, we going to use it in this project. As you can see, we have created store.
main.dart
Future<Null> main() async { var store = await createStore(); runApp(new BuyMeApp(store)); } 

After that create base and initialize state of application.
main.dart
class _BuyMeAppState extends State<BuyMeApp> { @override void initState() { super.initState(); widget.store.dispatch(new InitAction()); } @override Widget build(BuildContext context) { return new StoreProvider<AppState>( store: widget.store, child: new MaterialApp( title: 'BuyMe', theme: new ThemeData( primaryColor: const Color(0xFF02BB9F), primaryColorDark: const Color(0xFF167F67), accentColor: const Color(0xFFFFAD32), ), home: const HomeScreen(), ), ); } }

3. Create another dart file and name it home_screen.dart. Here, we'll create TabBar and Left Drawer menu. For handle Tabbar, we have created instance of TabController and given length 3 because we need three tab. 

For manage Drawer, we have created instance of Drawer and append instance of DrawerHeaderBox that'll contain header of drawer. As you can see complete file below.
home_screen.dart
import 'package:flutter/material.dart'; import 'package:flutter_drawer_tab_host/tab_screen.dart'; import 'package:flutter_drawer_tab_host/drawer/drawer_header.dart'; import 'package:flutter_drawer_tab_host/drawer/drawer_list.dart'; class HomeScreen extends StatefulWidget { const HomeScreen(); @override _HomeScreenState createState() => new _HomeScreenState(); } class _HomeScreenState extends State<HomeScreen> with SingleTickerProviderStateMixin { static final GlobalKey<ScaffoldState> scaffoldKey = new GlobalKey<ScaffoldState>(); TabController _controller; @override void initState() { super.initState(); _controller = new TabController(length: 3, vsync: this, ); } @override Widget build(BuildContext context) { return new Scaffold( key: scaffoldKey, appBar: new AppBar( iconTheme: new IconThemeData(color: const Color(0xFFFFFFFF),), title: new Text("BuyMe", style: new TextStyle( color: const Color(0xFFFFFFFF), fontSize: 20.0, fontWeight: FontWeight.w300, letterSpacing: 0.3, ), ), bottom: new TabBar( controller: _controller, indicatorSize: TabBarIndicatorSize.tab, labelColor: Color(0xFFFFFFFF), tabs: const <Tab>[ const Tab(text: 'Tranding'), const Tab(text: 'Men'), const Tab(text: 'Women'), ], ), ), drawer: new Drawer( child: new DrawerList( header: const DrawerHeaderBox(), onTheaterTapped: () => Navigator.pop(context), ), ), body: new TabBarView( controller: _controller, children: <Widget>[ new TabScreen("Tranding"), new TabScreen("Men"),
new TabScreen("Women"),
], ), ); } }


4. After that create tab_screen.dart file. It'll show tab screen content after switching. In this file, we just showing a text that display tab title. You can modify it according to your need.
tab_screen.dart
import 'package:flutter/cupertino.dart'; import 'package:flutter/material.dart'; class TabScreen extends StatelessWidget { TabScreen(this.listType); final String listType; @override Widget build(BuildContext context) { return new Scaffold( body: new Center( child: new Column( mainAxisAlignment: MainAxisAlignment.center, children: <Widget>[ new Text( listType, style: Theme.of(context).textTheme.display1, ), ], ), ), ); } }
5. After that create some redux dart that manage state of app.
app_reducer.dart
import 'package:flutter_drawer_tab_host/app_state.dart'; import 'package:flutter_drawer_tab_host/drawer/drawer_reducer.dart'; AppState appReducer(AppState state, dynamic action) { return new AppState( drawerState: drawerReducer(state.drawerState, action), ); }
app_state.dart
import 'package:flutter_drawer_tab_host/drawer/drawer_state.dart'; import 'package:meta/meta.dart'; @immutable class AppState { final DrawerState drawerState; AppState({ @required this.drawerState, }); factory AppState.initial() { return new AppState( drawerState: new DrawerState.initial(), ); } }

common_actions.dart
import 'package:flutter_drawer_tab_host/drawer/drawer_model.dart'; class InitAction {} class InitCompleteAction { InitCompleteAction( this.drawer, this.selectedDrawer, ); final List<DrawerModel> drawer; final DrawerModel selectedDrawer; } class ChangeCurrentTheaterAction { ChangeCurrentTheaterAction(this.selectedDrawer); final DrawerModel selectedDrawer; }

6. Now, Let's create our drawer screen. For it create a directory drawer. Here, We'll put all drawer files.


7. In drawer folder,  first of all create drawer_header.dart. Here, we using CircleAvatar, Image and two Text for screen header interface. 
drawer_header.dart
import 'package:flutter/material.dart'; class DrawerHeaderBox extends StatefulWidget { const DrawerHeaderBox(); @override _DrawerHeaderState createState() => new _DrawerHeaderState(); } class _DrawerHeaderState extends State<DrawerHeaderBox> { @override Widget build(BuildContext context) { var textTheme = Theme.of(context).textTheme; return new Container( color: const Color(0xFF02BB9F), constraints: const BoxConstraints.expand(height: 175.0), child: new Center( child: new Padding( padding: const EdgeInsets.all(16.0), child: new Column( crossAxisAlignment: CrossAxisAlignment.center, mainAxisAlignment: MainAxisAlignment.end, children: <Widget>[ new Stack( alignment: Alignment.center, children: <Widget>[ new CircleAvatar( radius: 30.0, backgroundColor: const Color(0xFF167F67), ), new Container( height: 30.0, width: 30.0, child: new Image.asset("assets/fevicn.png"), ) ], ), new Text( 'Developer Libs', style: textTheme.subhead.copyWith(color: Colors.white70), ), new Text( 'developerlibs@gmail.com', style: textTheme.subhead.copyWith(color: Colors.white70), ), ], ), ), ), ); } }


8. It's time to create dynamic list of drawer. To achieve it, Create drawer_list.dart. Here, We will display drawer list items.
drawer_list.dart
import 'package:flutter/material.dart'; import 'package:flutter_drawer_tab_host/app_state.dart'; import 'package:flutter_drawer_tab_host/drawer/drawer_list_view_model.dart'; import 'package:flutter_redux/flutter_redux.dart'; import 'package:meta/meta.dart'; class DrawerList extends StatelessWidget { DrawerList({ @required this.header, @required this.onItemTapped, }); final Widget header; final VoidCallback onItemTapped; @override Widget build(BuildContext context) { var statusBarHeight = MediaQuery.of(context).padding.vertical; return new Transform( transform: new Matrix4.translationValues(0.0, -statusBarHeight, 0.0), child: new StoreConnector<AppState, DrawerListViewModel>( distinct: true, converter: (store) => DrawerListViewModel.fromStore(store), builder: (BuildContext context, DrawerListViewModel viewModel) { return new DrawerListContent( header: header, onTheaterTapped: onItemTapped, viewModel: viewModel, ); }, ), ); } } class DrawerListContent extends StatelessWidget { DrawerListContent({ @required this.header, @required this.onTheaterTapped, @required this.viewModel, }); final Widget header; final VoidCallback onTheaterTapped; final DrawerListViewModel viewModel; @override Widget build(BuildContext context) { return new ListView.builder( itemCount: viewModel.drawer.length + 1, itemBuilder: (BuildContext context, int index) { if (index == 0) { return header; } var theater = viewModel.drawer[index - 1]; var isSelected = viewModel.currentDrawer.id == theater.id; var backgroundColor = isSelected ? const Color(0xFF01332b) : Theme.of(context).canvasColor; return new Material( color: backgroundColor, child: new Container( margin: EdgeInsets.fromLTRB(10.0, 0.0, 10.0, 0.0), padding: EdgeInsets.fromLTRB(10.0, 0.0, 10.0, 0.0), child: new Column( children: <Widget>[ new ListTile( onTap: () { viewModel.changeCurrentDrawer(theater); onTheaterTapped(); }, selected: isSelected, title: new Text( theater.name, style: new TextStyle( color: isSelected ? const Color(0xFFFFFFFF) : const Color(0xFF01332b), fontSize: 20.0, fontWeight: FontWeight.w300, letterSpacing: 0.3, ), ), ) ], ), decoration: new BoxDecoration(border: new Border(bottom: new BorderSide())), ), ); }, ); } }


9. Now create drawer_list_view_model.dart file. Here, we maintain state and keep drawer resource.
drawer_list_view_model.dart
import 'package:flutter_drawer_tab_host/app_state.dart'; import 'package:flutter_drawer_tab_host/common_actions.dart'; import 'package:flutter_drawer_tab_host/drawer/drawer_model.dart'; import 'package:flutter_drawer_tab_host/drawer/drawer_selectors.dart'; import 'package:meta/meta.dart'; import 'package:redux/redux.dart'; class DrawerListViewModel { DrawerListViewModel({ @required this.currentDrawer, @required this.drawer, @required this.changeCurrentDrawer, }); final DrawerModel currentDrawer; final List<DrawerModel> drawer; final Function(DrawerModel) changeCurrentDrawer; static DrawerListViewModel fromStore(Store<AppState> store) { return new DrawerListViewModel( currentDrawer: currentDrawerSelector(store.state), drawer: drawerSelector(store.state), changeCurrentDrawer: (theater) { store.dispatch(new ChangeCurrentTheaterAction(theater)); }, ); } }

10. After that create drawer_middleware.dart file. Here, You can change list item text and add new. In this file, we have write some code redux as discuss above.
drawer_middleware.dart
import 'dart:async'; import 'package:flutter/services.dart'; import 'package:flutter_drawer_tab_host/app_state.dart'; import 'package:flutter_drawer_tab_host/common_actions.dart'; import 'package:flutter_drawer_tab_host/drawer/drawer_model.dart'; import 'package:redux/redux.dart'; import 'package:shared_preferences/shared_preferences.dart'; class DrawerMiddleware extends MiddlewareClass<AppState> { static const String kDefaultTheaterId = 'default_theater_id'; final AssetBundle bundle; final SharedPreferences preferences; DrawerMiddleware(this.bundle, this.preferences); @override Future<Null> call(Store<AppState> store, action, NextDispatcher next) async { if (action is InitAction) { await _init(action, next); } else if (action is ChangeCurrentTheaterAction) { await _changeCurrentTheater(action, next); } else { next(action); } } Future<Null> _init( InitAction action, NextDispatcher next, ) async { List<DrawerModel> allTheaters = new List(); DrawerModel theater = new DrawerModel(id: "1030", name: "Electronics"); DrawerModel theater1 = new DrawerModel(id: "1014", name: "Fashion"); DrawerModel theater2 = new DrawerModel(id: "1012", name: "Furniture"); DrawerModel theater3 = new DrawerModel(id: "1039", name: "Sports"); DrawerModel theater4 = new DrawerModel(id: "1038", name: "Books"); DrawerModel theater5 = new DrawerModel(id: "1031", name: "Medical"); DrawerModel theater6 = new DrawerModel(id: "1011", name: "Vegetable"); DrawerModel theater7 = new DrawerModel(id: "1015", name: "Drink"); DrawerModel theater8 = new DrawerModel(id: "1016", name: "Watch"); allTheaters.add(theater); allTheaters.add(theater1); allTheaters.add(theater2); allTheaters.add(theater3); allTheaters.add(theater4); allTheaters.add(theater5); allTheaters.add(theater6); allTheaters.add(theater7); allTheaters.add(theater8); next(new InitCompleteAction(allTheaters, allTheaters.first)); } Future<Null> _changeCurrentTheater( ChangeCurrentTheaterAction action, NextDispatcher next, ) async { preferences.setString(kDefaultTheaterId, action.selectedDrawer.id); next(action); } }
11. Create drawer_model.dart  and put following model code.
drawer_model.dart
import 'package:meta/meta.dart'; class DrawerModel { DrawerModel({ @required this.id, @required this.name, }); final String id; final String name; }

12. Create drawer_reducer.dart. It will change state of drawer on basis of event.
drawer_reducer.dart
import 'package:flutter_drawer_tab_host/common_actions.dart'; import 'package:flutter_drawer_tab_host/drawer/drawer_state.dart'; import 'package:redux/redux.dart'; final drawerReducer = combineReducers<DrawerState>([ new TypedReducer<DrawerState, InitCompleteAction>(_initComplete), new TypedReducer<DrawerState, ChangeCurrentTheaterAction>( _currentTheaterChanged), ]); DrawerState _initComplete(DrawerState state, InitCompleteAction action) { return state.copyWith( currentTheater: action.selectedDrawer, theaters: action.drawer, ); } DrawerState _currentTheaterChanged(DrawerState state, ChangeCurrentTheaterAction action) { return state.copyWith(currentTheater: action.selectedDrawer); }
13. Create drawer_selectors.dart. It will maintain state of selected drawer item. 
drawer_selectors.dart
import 'package:flutter_drawer_tab_host/app_state.dart'; import 'package:flutter_drawer_tab_host/drawer/drawer_model.dart'; DrawerModel currentDrawerSelector(AppState state) => state.drawerState.currentTheater; List<DrawerModel> drawerSelector(AppState state) => state.drawerState.theaters;

14. Create drawer_state.dart. Here, we'll keep state of drawer.
drawer_state.dart
import 'package:flutter_drawer_tab_host/drawer/drawer_model.dart'; import 'package:meta/meta.dart'; @immutable class DrawerState { DrawerState({ @required this.currentTheater, @required this.theaters, }); final DrawerModel currentTheater; final List<DrawerModel> theaters; factory DrawerState.initial() { return new DrawerState( currentTheater: null, theaters: <DrawerModel>[], ); } DrawerState copyWith({ DrawerModel currentTheater, List<DrawerModel> theaters, }) { return new DrawerState( currentTheater: currentTheater ?? this.currentTheater, theaters: theaters ?? this.theaters, ); } @override bool operator ==(Object other) => identical(this, other) || other is DrawerState && runtimeType == other.runtimeType && currentTheater == other.currentTheater && theaters == other.theaters; @override int get hashCode => currentTheater.hashCode ^ theaters.hashCode; }

At the end,  merge all file and run it. You'll see 


You can get complete working project from Github. If you any query regarding above project feel free to ask it in comment section below.


Share:

Get it on Google Play

React Native - Start Development with Typescript

React Native is a popular framework for building mobile apps for both Android and iOS. It allows developers to write JavaScript code that ca...