If you are working on a big application with Android Studio and you may want to securely store the project code to a remote server. For this purpose, we can use BitBucket repository system. Which will allow you to create a repository and push all source code safely.
 It is an online Application for versioning control, web-based storage of codes. In simplest term, it can contain a repository of project source codes in Mercurial or Git revision control system. It’ll provide you all Git features with Project management system. So you can create Multiple branches, Tags and manage your source code safely even with multiple developers working on the same project.
In this post, we'll explain the complete steps to upload and manage your project source code with Android Studio and BitBucket. Let's see with following steps:
1. First of all, create a BitBucket account, You can create a BitBucket account from here.
2. After creating Account, Login to BitBucket website and Create a new repository.
3. After that, get the link of the new repository. It’ll be used in Android Studio later.
4. Now, Start Android Studio and open project that you want to commit on BitBucket. In Android Studio, Go to VCS menu -> Select Enable Version Control Integration.
5. You’ll see a popup to select version Control System. Here select Git and click OK.
You’ll see your project files change to orange color.
6. Now right click Project, it will display a menu. Goto Git->Select Add.
After clicking on Add, Project files will change to the green color.
7. Now Again right click on Project and in menu Go to Git-> Select Commit Directory.
It’ll display a Commit Changes dialog, Enter your Commit Message and click Commit.
8. Now right Click on Project Source Code, in menu Go to Git-> Select Repository -> and then Select Push or you can use shortcut keys Ctrl+Shift+K.
You’ll see Push Commits dialog, In this dialog, you’ll see master –> Define Remote.
9. Click on Define Remote, It’ll display a Define Remote dialog. In this dialog paste the URL(that is taken in BitBucket after creating repository). And click OK.
In the next pop up window, you have to enter your email and password of BitBucket account. Enter it carefully.
10. It’ll show all the Committed files and message you entered before when committing directory. Now Click on Push. It’ll push all code files to the BitBucket repository.
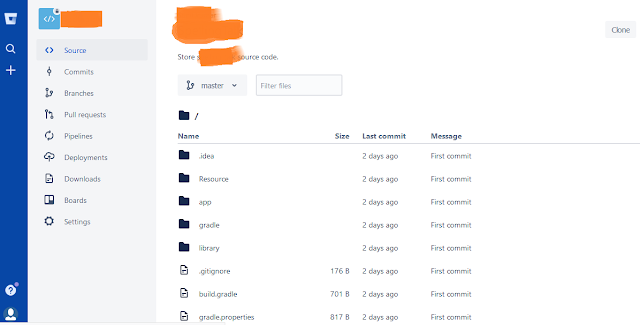
Now if you go to BitBucket website in a browser and open your repository and refresh it. You’ll see project source code pushed safely to your repository as above shown. But if you are facing any problem and have quires, please feel free to ask it from below comment section.


