As we know, mobile having a small screen to display content. That why most apps contain several screens to display different types of information.
Example: We might have a screen that shows products. Our users could then tap on a product to get more information about it on a new screen. In that case, a user will move on another screen of the app. When a user navigates to application screens. Sometimes we need to handle device back press event like:
1. We want to show a pop-up before the close app or close some connection that app using.
2. You can ask the user to confirm that they want to discard their changes when they tap the back button or back navigation arrow.
How can catch the back pressed event in Flutter?
You can handle a back pressed event in the Flutter with help of WillPopScope widget. You have to use it to create a screen. Just requirement of this widget. We have to make it root widget of the screen. Once you make it root widget of the screen. You will find an onWillPop method. Here, you can write your code for handle it back press event.
Let's check out it with a small simple example. In this post, we create a screen. where we use WillPopScrope widget and show an app close confirm dialog.
Creating a new Project
1. Create a new project from File ⇒ New Flutter Project with your development IDE.
2. Open main.dart file and edit it. As we have set our theme and change debug banner property of Application.
main.dart


import 'dart:async';
import 'package:flutter/material.dart';
import 'package:flutter_route_navigation/homepage.dart';

void main() {
  runApp(new MaterialApp(
    debugShowCheckedModeBanner: false,
    theme: new ThemeData(
      primaryColor: const Color(0xFF02BB9F),
      primaryColorDark: const Color(0xFF167F67),
      accentColor: const Color(0xFFFFFFFF),
    ),
    home: new HomePage(),
  ));
}
3. After that create a homepage.dart file. It will contain our main logic of back press. In the build method of this widget use WillPopScope as a root of the screen as we have done.
homepage.dart


  @override
  Widget build(BuildContext context) {
    return new WillPopScope(
      onWillPop: _onBackPressed,
      child: new Scaffold(
        appBar: new AppBar(
          title: new Text(
            "On Back pressed",
            style: new TextStyle(color: Colors.white),
          ),
        ),
        body: new Center(
          child: new Text("Home Page"),
        ),
      ),
    );
  }
in the above snippet, we have written a _onBackPressed method. It'll invoke when you back press from the mobile hardware button. To observe back press event, we have created a dialog. It'll display a Yes and No option button. When you click on Yes button app will close. Here, you can see the final code of the screen.
homepage.dart


import 'dart:async';
import 'package:flutter/material.dart';

class HomePage extends StatefulWidget {
  HomePage({Key key, this.title}) : super(key: key);
  final String title;
  @override
  State<StatefulWidget> createState() => new _HomePageState();
}

class _HomePageState extends State<HomePage> {
  Future<bool> _onBackPressed() {
    return showDialog(
          context: context,
          builder: (context) => new AlertDialog(
                title: new Text('Are you sure?'),
                content: new Text('Do you want to exit an App'),
                actions: <Widget>[
                  new GestureDetector(
                    onTap: () => Navigator.of(context).pop(false),
                    child: roundedButton("No", const Color(0xFF167F67),
                        const Color(0xFFFFFFFF)),
                  ),
                  new GestureDetector(
                    onTap: () => Navigator.of(context).pop(true),
                    child: roundedButton(" Yes ", const Color(0xFF167F67),
                        const Color(0xFFFFFFFF)),
                  ),
                ],
              ),
        ) ??
        false;
  }

  Widget roundedButton(String buttonLabel, Color bgColor, Color textColor) {
    var loginBtn = new Container(
      padding: EdgeInsets.all(5.0),
      alignment: FractionalOffset.center,
      decoration: new BoxDecoration(
        color: bgColor,
        borderRadius: new BorderRadius.all(const Radius.circular(10.0)),
        boxShadow: <BoxShadow>[
          BoxShadow(
            color: const Color(0xFF696969),
            offset: Offset(1.0, 6.0),
            blurRadius: 0.001,
          ),
        ],
      ),
      child: Text(
        buttonLabel,
        style: new TextStyle(
            color: textColor, fontSize: 20.0, fontWeight: FontWeight.bold),
      ),
    );
    return loginBtn;
  }

  @override
  Widget build(BuildContext context) {
    return new WillPopScope(
      onWillPop: _onBackPressed,
      child: new Scaffold(
        appBar: new AppBar(
          title: new Text(
            "On Back pressed",
            style: new TextStyle(color: Colors.white),
          ),
        ),
        body: new Center(
          child: new Text("Home Page"),
        ),
      ),
    );
  }
}
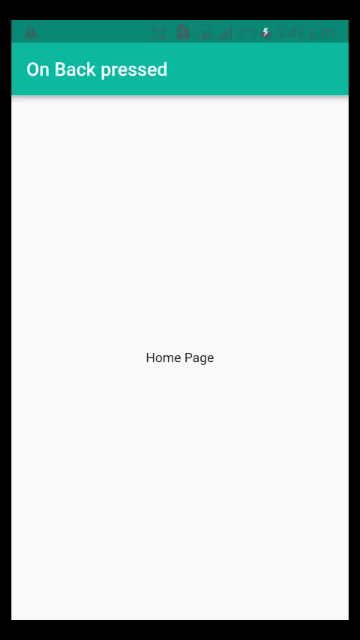
Now merge that code and run the app. You'll see the following output of this sample.
If you followed this post carefully. I hope your app working fine as we have explained about the back press. If you facing any issue to implement it please feel free to ask it from the comment section below and you can ask it on SLACK.