As we know, we have to make a hierarchy of widgets to design a screen in Flutter with help of Stateless and Stateful widgets. As the names suggest, the Stateless widget has no internal state which means once built and can never be modified. On the other side, the Stateful widgets are dynamic and have a state, which we can be modified easily throughout their life-cycle without re-initiation.
 The state of widget is the information that can be read synchronously when the widget is built and change during the lifetime of the widget. In order to change widget, you need to update the state object which can be update by using setState() function of Stateful widgets.
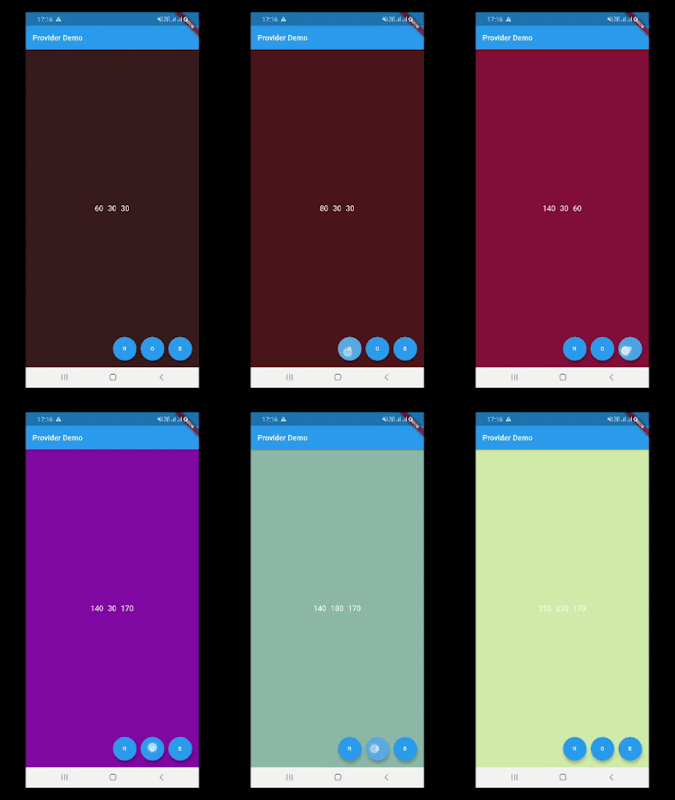
In this post, we'll see another way to update screen widget without calling setState() of a widget. We'll use provider package for state management that is recommended by the Flutter team in Google io-2019. It is a dependency injection system that is built with widgets for widgets. With the help of this package, we'll create a small example that will show background color change, as shown below:
Creating a new Project
 The state of widget is the information that can be read synchronously when the widget is built and change during the lifetime of the widget. In order to change widget, you need to update the state object which can be update by using setState() function of Stateful widgets.
 In this post, we'll see another way to update screen widget without calling setState() of a widget. We'll use provider package for state management that is recommended by the Flutter team in Google io-2019. It is a dependency injection system that is built with widgets for widgets. With the help of this package, we'll create a small example that will show background color change, as shown below:
Creating a new Project
2. Now, add provider: ^2.0.0+1 Flutter plugin as a dependency in the pubspec.yaml file.
3. After that open main.dart file and edit it. As you see, we have created a tree of widgets. Inside the material app, we’ll wrap our homepage widget with ChangeNotifierProvider. Builder is the actual state object where we’ll instantiate our class.
now inside the HomePage tree widget, we can easily access our object using two ways. Either we can use Provider.of<Object>(context) or Consumer Widget.
4. After that create color_manager.dart class and extend with ChangeNotifier. As you’ve probably must have guessed, all it does is add listening capability to our class. When we call any method(incrementRed..) of this class. It'll notify the updated values to the widget that we have linked by using Provider.
If you have followed the article carefully, you can see the app running very smoothly as shown above and backgound color changes by clicking on red, green and blue color cobination. But if you are facing any problem, please feel free to ask from comments.


