Pop-up is like a dialog box that gains complete focus when it appears on the screen. Pop-up is usually used to show some additional information or something a user wants to know after an event takes place.
In this tutorial, we will create a pop-up widget with Flutter framework. It will show some normal and clickable text. The final widget will look like this.

If you haven't installed and set-up Flutter. I suggest you do it and read base of Flutter from here:- Flutter - Introduction and setup
As we know, everything in flutter is a widget. So, we going to create a widget that will display a pop-up alert with an image and clickable text. Let's start it.
1. Create a flutter project as I have explained here:- Flutter - Introduction, and setup.
2. Open main.dart file and start building widget.
3. To build a pop-up, we going to use the stateful widget.
4. After that create state class that will manage a state of the widget.
5. Now, start modifying the build method.
6. Create a RaisedButton widget that will show a pop-up when we click on it.
It will look like:-

7. Now, Let's create the main part of the tutorial that is a pop-up widget.
above is a container for our pop-up. It contains other widget and a FloatButton. We use it for the close pop-up.
As you can see, we have created _buildAboutText() and _buildLogoAttribution() widgets. Here, _buildAboutText() show some text information of pop and _buildLogoAttribution() will show image on pop-up.
8. To manage clickable content. We have to add url_launcher: ^3.0.0 dependency as I have used.
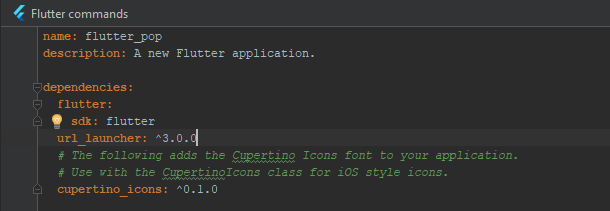
It will help us to navigate to other Application of OS. Like here, we will move on chrome to open a website.
9. After that create TapGestureRecognizer for those content where you want to click.
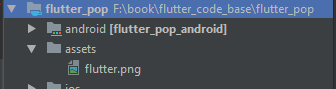
10. Create assets folder on the root of the project and put any png file as i have put flutter.png.
At the end, let's see complete main.dart file.
Put above main.dart file in your project and resource. Now, run it and view the pop-up action.In this tutorial, we will create a pop-up widget with Flutter framework. It will show some normal and clickable text. The final widget will look like this.

If you haven't installed and set-up Flutter. I suggest you do it and read base of Flutter from here:- Flutter - Introduction and setup
As we know, everything in flutter is a widget. So, we going to create a widget that will display a pop-up alert with an image and clickable text. Let's start it.
1. Create a flutter project as I have explained here:- Flutter - Introduction, and setup.
2. Open main.dart file and start building widget.
3. To build a pop-up, we going to use the stateful widget.
class Home extends StatefulWidget {                                                             StatefulWidget
  const Home();
  @override
  _HomeState createState() => new _HomeState();
}
4. After that create state class that will manage a state of the widget.
class _HomeState extends State<Home> {                                                   Widget State Class


}
5. Now, start modifying the build method.
@override                                                                                                                 Main build
  Widget build(BuildContext context) {
    return new Container(

      //We have set padding from top of screen.
      padding: const EdgeInsets.only(top: 100.0),

      //Screen Theme.
      color: Theme.of(context).scaffoldBackgroundColor,

      // It will display a button. Will will display pop-up on click here.
      child: new Column(
        children: <Widget>[
          home(context),
        ],
      ),
    );
}
6. Create a RaisedButton widget that will show a pop-up when we click on it.
Widget home(BuildContext context) {
    return new Material(
      child: new RaisedButton(
        child: const Text('Show'),
        color: Theme.of(context).accentColor,
        elevation: 4.0,
        splashColor: Colors.amberAccent,
        textColor: const Color(0xFFFFFFFF),
        onPressed: () {
          showDialog(
            context: context,
            builder: (BuildContext context) => _buildAboutDialog(context),
          );
          // Perform some action
        },
      ),
    );
}
FF),It will look like:-

7. Now, Let's create the main part of the tutorial that is a pop-up widget.
Widget _buildAboutDialog(BuildContext context) {
    return new AlertDialog(
      title: const Text('About Pop up'),
      content: new Column(
        mainAxisSize: MainAxisSize.min,
        crossAxisAlignment: CrossAxisAlignment.start,
        children: <Widget>[
          _buildAboutText(),
          _buildLogoAttribution(),
        ],
      )
      actions: <Widget>[
        new FlatButton(
          onPressed: () {
            Navigator.of(context).pop();
          },
          textColor: Theme.of(context).primaryColor,
          child: const Text('Okay, got it!'),
        ),
      ],
    );
}
rimaryColor,above is a container for our pop-up. It contains other widget and a FloatButton. We use it for the close pop-up.
As you can see, we have created _buildAboutText() and _buildLogoAttribution() widgets. Here, _buildAboutText() show some text information of pop and _buildLogoAttribution() will show image on pop-up.
8. To manage clickable content. We have to add url_launcher: ^3.0.0 dependency as I have used.
It will help us to navigate to other Application of OS. Like here, we will move on chrome to open a website.
9. After that create TapGestureRecognizer for those content where you want to click.
TapGestureRecognizer _flutterTapRecognizer;
TapGestureRecognizer _githubTapRecognizer;

@override
void initState() {
  super.initState();
  _flutterTapRecognizer = new TapGestureRecognizer()..onTap = () => _openUrl(flutterUrl);
  _githubTapRecognizer = new TapGestureRecognizer()..onTap = () => _openUrl(githubUrl);
}
10. Create assets folder on the root of the project and put any png file as i have put flutter.png.

At the end, let's see complete main.dart file.
import 'package:flutter/gestures.dart';
import 'package:flutter/material.dart';
import 'package:url_launcher/url_launcher.dart';

void main() => runApp(new MyApp());

class MyApp extends StatelessWidget {

  @override
  Widget build(BuildContext context) {
    return new MaterialApp(
      home: new Home(),
    );
  }

}

class Home extends StatefulWidget {
  const Home();
  @override
  _HomeState createState() => new _HomeState();
}

class _HomeState extends State<Home> {

  static const String flutterUrl = 'https://flutter.io/';
  static const String githubUrl = 'http://www.codesnippettalk.com';

  static const TextStyle linkStyle = const TextStyle(
    color: Colors.blue,
    decoration: TextDecoration.underline,
  );

  TapGestureRecognizer _flutterTapRecognizer;
  TapGestureRecognizer _githubTapRecognizer;

  @override
  void initState() {
    super.initState();
    _flutterTapRecognizer = new TapGestureRecognizer()..onTap = () => _openUrl(flutterUrl);
    _githubTapRecognizer = new TapGestureRecognizer()..onTap = () => _openUrl(githubUrl);
  }

  @override
  void dispose() {
    _flutterTapRecognizer.dispose();
    _githubTapRecognizer.dispose();
    super.dispose();
  }

  void _openUrl(String url) async {
    // Close the about dialog.
    Navigator.pop(context);

    if (await canLaunch(url)) {
      await launch(url);
    } else {
      throw 'Could not launch $url';
    }
  }

  Widget home(BuildContext context) {
    return new Material(
      child: new RaisedButton(
        child: const Text('Show Pop-up'),
        color: Theme.of(context).accentColor,
        elevation: 4.0,
        splashColor: Colors.amberAccent,
        textColor: const Color(0xFFFFFFFF),
        onPressed: () {
          showDialog(
            context: context,
            builder: (BuildContext context) => _buildAboutDialog(context),
          );
          // Perform some action
        },
      ),
    );
  }

  Widget _buildAboutDialog(BuildContext context) {
    return new AlertDialog(
      title: const Text('About Pop up'),
      content: new Column(
        mainAxisSize: MainAxisSize.min,
        crossAxisAlignment: CrossAxisAlignment.start,
        children: <Widget>[
          _buildAboutText(),
          _buildLogoAttribution(),
        ],
      ),
      actions: <Widget>[
        new FlatButton(
          onPressed: () {
            Navigator.of(context).pop();
          },
          textColor: Theme.of(context).primaryColor,
          child: const Text('Okay, got it!'),
        ),
      ],
    );
  }

  Widget _buildAboutText() {
    return new RichText(
      text: new TextSpan(
        text: 'Android Popup Menu displays the menu below the anchor text if space is available otherwise above the anchor text. It disappears if you click outside the popup menu.\n\n',
        style: const TextStyle(color: Colors.black87),
        children: <TextSpan>[
          const TextSpan(text: 'The app was developed with '),
          new TextSpan(
            text: 'Flutter',
            recognizer: _flutterTapRecognizer,
            style: linkStyle,
          ),
          const TextSpan(
            text: ' and it\'s open source; check out the source '
                'code yourself from ',
          ),
          new TextSpan(
            text: 'www.codesnippettalk.com',
            recognizer: _githubTapRecognizer,
            style: linkStyle,
          ),
          const TextSpan(text: '.'),
        ],
      ),
    );
  }

  Widget _buildLogoAttribution() {
    return new Padding(
      padding: const EdgeInsets.only(top: 16.0),
      child: new Row(
        children: <Widget>[
          new Padding(
            padding: const EdgeInsets.only(top: 0.0),
            child: new Image.asset(
              "assets/flutter.png",
              width: 32.0,
            ),
          ),
          const Expanded(
            child: const Padding(
              padding: const EdgeInsets.only(left: 12.0),
              child: const Text(
                'Popup window is like a dialog box that gains complete focus when it appears on screen.',
                style: const TextStyle(fontSize: 12.0),
              ),
            ),
          ),
        ],
      ),
    );
  }

  @override
  Widget build(BuildContext context) {
    return new Container(

      padding: const EdgeInsets.only(top: 100.0),

      color: Theme.of(context).scaffoldBackgroundColor,

      child: new Column(
        children: <Widget>[
          home(context),
        ],
      ),
    );
  }
}